As we're just entering the next generation of consoles around the release of Assassin's Creed Valhalla, we can look back and see many of the game mechanics that have become mainstays of this last generation. One of those is definitely a photo mode, which many games have added over the past few years. Many of these weren't updated until a later patch, but Assassin's Creed Valhalla included a photo mode right from the start that lets you take photos of Eivor's adventures.
How to take pictures
Assassin's Creed Valhalla is a very beautiful game as you venture across Norway and England, not to mention a few other special locations you'll gain access to later. As a result, there are a lot of things you might want to capture as a photo while playing.
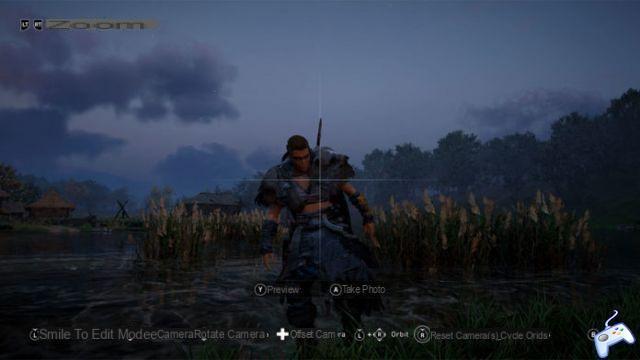
The good news is that Photo Mode is easy to use in Assassin's Creed Valhalla, sometimes almost a little too easy in that you can accidentally talk about it without knowing how you did it. To enable photo mode in-game, all you have to do is press the left and right analog sticks. This is also known as L3 and R3 on PlayStation.
As soon as you do this, everything happening in the game will pause and the photo mode overlay will appear. From there, you have several options to choose from, such as moving around the camera to get a different angle. The real fun starts when you press down on the left analog stick, which puts it into edit mode.
The edit mode allows you to add various filters to your images like you might find on Instagram or similar. It also lets you get a bit more precise by adjusting things like depth of field, contrast, noise, bloom, and more. Pressing Y/Triangle will dismiss the UI and allow you to see what the image would look like with your specified settings before taking it with A/X.