
le Tin Man Easter Egg Quest was completed in record time by the voracious Call of Duty: Zombies community. This series of hidden objectives and tricky challenges was absolutely devoured, and we've put the pieces together to explain how to complete each quest step. Like most of these huge Easter Eggs, you'll have to do just about everything on the map - unlock Pack-a-Punch, rebuild Klaus, get the Wondrous Weapon, and more. Fortunately, this Easter egg is surprisingly simple. Is it cryptic? Oh, absolutely! But if you know what to do and where to go, this easter egg is possible to complete even solo.
For once, the final boss might be the toughest hurdle for solo players to clear. The rest is completely doable. But having a few friends around helps. Here's how to complete each part of the massive Mauer Der Toten Easter Egg quest.
More Black Ops Cold War Zombies: Mauer Der Toten Guides
How to Power Up and Pack-A-Punch | How to build and upgrade Klaus | How To Unlock Magic Weapon FREE | How to Find the Secret Bunny Nightclub Easter Egg
Before you start | Prerequisites for the Easter Egg Quest
Before starting the big easter egg quest, you will need to perform other tasks around the map. You can do some of these tasks as you complete the stages – some are absolutely necessary. These steps can be completed at any time and in any order. You should unlock the Pack-a-Punch machine, rebuild and upgrade Klaus, and get your hands on a wondrous weapon.
- Prerequisite #1: Unlock Pack-a-Punch
- Prerequisite #2: Rebuild and upgrade Klaus
- Prerequisite #3: Obtain the wondrous weapon
You can unlock the Pack-a-Punch, then rebuild Klaus, then get a magic weapon while you work on upgrading Klaus as well.
- Prerequisite #1: Unlock Pack-a-Punch
- Very simple. Simply follow the goals – turn on the power by reaching the Feeding room, find the two fuses (dropped by two Tempest bosses) and restores power.
- After that, go to West Berlin street and activate the Pack-a-Punch to start the Trial of the Dark Aether. Defeat the Disciple boss to unlock the Pack-a-Punch.
Then you have to rebuild Klaus.
- Prerequisite #2: Rebuild Klaus
- Go to the Safe House to find Klaus, the robot man you can restore. You need two items to restore it: the robot's hands and the battery.
- Battery: Drops when you defeat a Tank Zombie Boss. Zombie tanks spawn on turn 10+.
- robot hands: Install the Brain rot mod on any weapon with the Pack-a-Punch, then go to Hotel Room 305. Use Brain Rot to spawn a friendly zombie near the barricaded door - the friendly zombie will destroy the door, allowing you to enter the room robot hands. Interact with the body on the bed.
Once you have rebuilt Klaus, you can acquire a FREE magic weapon.
- Prerequisite #3: Obtain the wondrous weapon
- You can get the magic weapon randomly from the mystery box, as a reward for completing the trials, or you can get a guaranteed one by completing a mini easter egg quest with Klaus. To get a free magic weapon, rebuild Klaus, then collect the UV Attachment.
- How to Get the UV Light Accessory: Take Klaus to the Control room switch and order it near the single locker against the wall. He will open it and you can grab the UV accessory inside.
- After getting the UV accessory, travel through three rooms and find three two-digit codes on the walls that only appear under UV light.
- Dial code n°1: Found in the clothing factory. Use the UV light to find two numbers on the wall.
- Dial code #2: Found in the Passage of services.
- Dial code #3: Found in the Grocery.
Enter the three dialing codes in the safe in Hotel room 305. There is a guaranteed magic weapon inside.
- Prerequisite #2: Part 2 – Leveling Klaus
- While working on the magic weapon, you can also work on upgrading Klaus. To upgrade Klaus, you need to collect three parts – the microwave dish, And two cosmetic discs.
- microwave dish: Found in the dark "Death Strip" area outside the PaP machine. Look for piles of debris and search for them – keep searching, and the Microwave Dish will randomly appear as a reward.
- cosmetic discs: Two cosmetic discs are located in special boxes scattered around the map. Use the UV light on each to see a small Klaus icon. Order Klaus to approach the box so that he smashes it.
There are six boxes in total. You can find them in the locations listed below.
- Klaus Box Locations:
- Box #1: Hotel Lounge – In the inner corner of the room.
- Box #2: 5th floor apartments – Between the door and the shelf.
- Box #3: Suite Blasted – Near the workbench. Use the zip line on the right side of West Berlin Street.
- Box 4: Rue de Berlin Ouest – Under the sign Cafe Mueller.
- Box #5: Maintenance Tunnel – Outside the tunnel leading to the Safe House.
- Box #6: Ghost Station – On the dock in front of the maintenance tunnel door.
Use every item at the Klaus Upgrade Station in the clothing factory. Once Klaus manages to kill enough, the upgrade station will transform VERT. Now you can use it. You will have to defend it for 60 seconds. To fully upgrade Klaus, you need to use every item and then defend - so you'll need to dispatch Klaus (and defend him) three times to fully upgrade him. You can work on this while doing different Easter egg stages.
Step 1: Access the secret lab and load the essence
To unlock the Secret Lab, you must Klaus and A formidable weapon – you don't need to upgrade Klaus yet.
- Summon Klaus in the Access to sewers room and lead him up the small staircase to a large section of unbroken brick wall. When Klaus is near, he'll knock through to reveal a metal door.
- Then shoot the door with the Blazer Mod Wonder Arme until it melts.
How to get the Blazer mod: Kill zombies after acquiring the magic weapon. Randomly one will drop the Blazer Mod which turns the Wonder weapon into a laser beam.
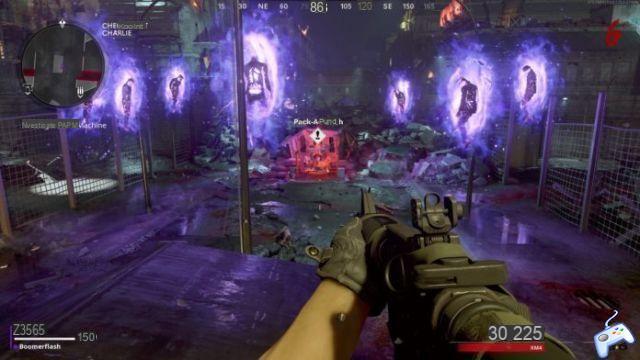
Inside of Secret laboratory, eliminate the Disciples that appear to remove the energy shield from the cartridge device. Collect the three canisters, then travel to the three Essence Collectors et insert the container. For now, all you have to do is PLACE THE BOXES, that's it.
Essence Harvesters spawn randomly and can spawn in the following locations. Three will always appear on each card.
- Essence Gathering Location #1: Sewer Access – On the wall in the main room near where the Tempest fuse spawns.
- Essence Harvest Location #2: West Berlin Street — Against a metal shed.
- Essence Gathering Location #3: Driveway — Next to the dumpster.
- Gasoline harvest Site n°4: Ghost Station — Near the counter of the small office on the platform.
- Essence Harvester Location #5: Korber Rooftop — Near the perk machine and near the fireplace.
- Essence Harvest Location #6: Penthouse destroyed — Along the inside of the glass wall.
- Essence Gathering Location #7: Streets of East Berlin — Between the bar and the electronics store.
Collect the Gas Trap: After placing the cans in the fuel collectors, back to the secret lab — when you enter, go down to the lower floor, turn around and look in the the right corner. Shoot the device in that corner with the Marvel Weapon Blazer to unlock the cabinet and retrieve the gas trap.
With the gas trap you can now load the canisters.
- How to refill canisters: Go to each Essence Collector and drop the Essence Trap close. This will cause Storm boss to spawn. Kill Tempest bosses that spawn— kill 6~ to charge canister. When charged, it glows with purple black aether energy. Collect the loaded container and return to the secret lab. Return the Canister to the device you took it from.
Once a Gasoline Trap is depleted, you will need to back to the secret lab to get another one. Load the canister onto all three harvesters and return to the secret lab, plugging in all three, to complete this step.
Step #2: Stop the train, get the warhead and ID card
Then we need to get a nuclear warhead. To do this you need a Improved Klaus.
How to stop the train: go to Control room switch – on the main switch station, you will find a new interaction prompt. Use it to change train lines. Then exit to ghost station et place Klaus on the train tracks farther from the switch control room (so when leaving the control room, cross the first set of tracks, then put Klaus on the second set of tracks) – do this before the train arrives.
Then a train will arrive and Klaus will stop the train, allowing you to board. Inside the train, you can collect two items: the ID card and Warhead.
- Warhead: Found in the crate at the end of the stopped train.
- ID card: Found on a corpse in one of the train seats.
Step 3: Build the Klaus Headgear
Then we have to upgrade Klaus again. To do this, you need to find three items: Antenna, Transistor and Electronic Cards.
- Antenna: Rooftop Apartment – Shoot the rooftop antenna tower with any magic weapon to bring it down. Collect the Antenna part that falls below.
- Transistor: Electronics Store – Shoot the retro radios (find a few directly to the left as you enter the door opposite the bar) with any magic weapon. Keep shooting at them until one drops this item.
- E-cards: Ghost Station – On the platform with the stairs leading up, go to the ticket office and look for a box above the sign. Shoot this little box with any magic weapon to knock this part down.
Once you have the coins, go back to the safe house and interact with Klaus in his chair to install them. You now have upgraded Klaus with the Hacking Helm.
Step 4: Enable Satellite Disruptor
Use the computer on the table in the center of the Secure room - with the ID you can now select "Browse Files" - keep doing this until you get a special prompt that says "Enable Satellite Disruptor". Stop here and get ready. Once this step has started, you only have 5 minutes to complete it.
- Activate interfering satellite with the Secure room the computer.
- Go to tents (streets in East Berlin or streets in West Berlin) and use the computer indoors. Either computer is working. Activate the computer to start the timer.
- Megaton impersonators and bosses will appear. Kill them and collect them Roche d’uranium.
- Use the uranium stone on the Worktable to create the Uranium device.
NOTE: While holding the Uranium device, you take damage slowly. Drop it to recover your health.
- With Uranium device, interact with the Korber Rooftop Zipline at the large "KORBER" sign. The zip line goes directly through the "O" of the sign.
- Go back and get the second one Roche d’uranium (dropped from previous Mimic/Megaton boss spawn) and use it on a workbench to gain a second Uranium device.
- Then go to Destroyed penthouse and use the Uranium device on the zipline that leads to the Korber rooftop – the same zipline with the other Uranium device. Place it and the two devices will snap into each other – colliding and combining.
Get off at East Berlin streets and pick up the Cleaned rock. Back to Secret laboratory and use the canister station. You must now repeat these steps to get a second purified rock.
NOTE: Once the cleaned rock is created, the timer will stop. You are free to leave the cleansed rock on the ground until you are ready to move on to the next step.
Go back to safe house, use the computer, then use the computer in the opposite tent you used the first time — if you used the computer tent in East Berlin, go to West Berlin, and vice versa.
WARNINGS: Place the second purified rock Secret laboratory initiate it combat de boss final. Don't do it until you're ready.
Stage #5: The boss fight and the end
The 1 phase: The boss is Valentina – it spawns in the Secret laboratory first, summon swarms of zombies. She has a blue shield and a red health bar. Remove his shield to damage him. She sporadically recharges her shield during combat. There is nothing special about this phase, just run and shoot him.
After around 20% of her HP is down, she will teleport to a new location. When she changes location, you can buy ammo or reload your armor.
Phase 2: In phase 2, Valentina goes to Destroyed penthouse roof. For this phase, Valentina earns a instakill attack. Your HUD will shake and produce a swirling effect. When this happens, take cover on the lower level of the area and place a wall between you and her.
Valentina will also spawn flying zombies around her to absorb their health. Destroy the floating zombies before she can absorb them.
She no longer gains special attacks at this point. Instead, she moves slots every 20% HP down. She will go to West Berlin streetThen East Berlin streetAnd finally back to the secret lab for the final phase.
Phase 3: In the Secret laboratory, defeat Valentina and interact with the body. A short cutscene will play, then you will regain control. you must defend Klaus as he approaches the giant portal - when he enters the portal, the easter egg quest is complete and you will get the ending cutscene.
Plus de guides Black Ops Cold War The Machine:
Die Maschine Easter Egg Guide | How to complete each step | How To Unlock Pack-A-Punch Guns & Upgrade | Cutting Machines Guide | How To Get The DIE Shockwave Wonder Weapon | Cutting Machines Guide | How To Upgrade To All 4 Wonder Weapon Variants | Die Machine Guide
More Firebase Z Zombies guides:
How to Power Up and Pack-A-Punch | Weapon Leveling Guide | How To Unlock The Ray Gun Wonder Weapon (Free) | How To Complete The Main Easter Egg Quest | Firebase Z Guide | Secret Song Easter Egg and Tape Locations | Free Jugger-Nog Teddy Bear Easter Egguf